
This guide will walk you through the standard Git workflow, explaining the most commonly used commands. If you’re new to Git, this guide will help you get up and running in no time!
Prerequisites:
- Git installed
- Passing familiarity with the *nix command line
What is Git?
Git is a version control system ('VCS'), used for managing the source code of software projects. Each copy, or 'clone' of a repository contains a working copy of the source code, plus an entire history of all changes ('commits').
Developers collaborate on software projects by mediating code between their copies of a repository. Most commonly, this happens by pushing code to, and pulling code from, a remote repository hosted by a third party (such as Github, GitLab or Bitbucket).
Git really shines when it's used within distributed teams. There is no single source of truth, and therefore no single point of failure - if your remote server becomes temporarily inaccessible, developers can still continue to work offline, with changes being merged as and when connectivity becomes available. Centralised VCS systems require a connection to the server for most operations, preventing collaboration and impeding workflow if the system goes down.
That being said, Git has a steeper learning curve, as developers need to both manage their own local repository and understand how their local changes are merged into the remote repository when they're pushed upstream. The terminology can be confusing to get to grips with at first - especially so if you have previous experience with a centralised VCS, as seemingly analogous concepts don't map to Git in the way you might expect.
Once you've learned the basics though, you'll discover Git to be an indispensible part of your developer toolkit.
Let's get started!
Getting Started
If this is the first time you’ve used Git, the first thing you’ll want to do is set up your global config. You only have to do this once --
git config
git config --global user.name “Your name”
git config --global user.email your@email.com
This lets Git know who to attribute commits to. If you want to check what is stored in your config at any point, use the --list flag - git config --list
Creating a repository
Next, let's navigate into to a directory that you want to place under source control.
cd /your-dir
Then initialise the repo --
git init
This command creates a subdirectory in your working directory called .git - this is where your git config and commit metadata is stored. (Why not go and have a poke around in there if you’re curious?)
Excluding files
A .gitignore file tells Git which files you don’t want tracked, so file references to your build directory and config secrets should go in here.
cd /where/your/code/is
touch .gitignore
edit .gitignore
(inside your .gitignore file)
.DS_Store   // exclude all files called .DS_Store
build/      // … and everything in the build folder
*.md        // … exclude all markdown files
!readme.md  // … but not readme.md
Creating this immediately after initialising your repo saves headaches later on - if you accidentally commit config secrets to your repo, the process of scrubbing through all the commits you’ve made between adding the file and realising your mistake can be a pain.
The stage
The basic Git workflow is an iterative cycle of the same three steps:
Edit working copy > add changed files to stage > commit changes.
When talking to developers that come to Git from CVCS experience, I've found that one of the more challenging concepts is that of 'the stage'. The stage is an interstitial area where you collate your changes in preparation for the next commit.
Staging files
git add <file> is the command used to track the changes made to a file.
On a fresh repository, you'll generally want to use git add .. This will add the contents of your working directory to the stage. git add . is recursive - it will include all contents of the current folder and nested folders.
You can also add individual files with git add <filename>
Deleting files
To delete a file, git rm <filename> and then flag the change by adding it to the stage as above.
Checking state
git status shows you the difference between your working copy and your previous commit. If you make fresh changes to your code and then run git status, you'll see that modified files have been flagged. git add . will add them to the stage, and running git status again will show the files as marked for addition to the next commit.
Committing changes
git commit will commit staged files to the index, capturing a snapshot of your code and saving it to the repo's history.
If you commit without passing the -m flag, Git will open an editor for you to write a commit message. By default the editor is Vim. Use I to INSERT, Esc to stop writing, :wq to save your changes and quit the editor.
Use the -m flag to pass a commit message at the same time as committing your files.
git commit -m <commit-message>
When you make a commit, the response will include the unique id of the commit. The latest commit is referred to as the HEAD (cf. 'tail').
Working with remote repos
Up until this point we've been exclusively dealing with local repositories. To work with an externally hosted repo (on Github, for example), we need to clone it.
git clone
This will create a copy of the remote repo locally. The clone command will automatically set up a reference to the URL from which you cloned the repository, so you won’t have to configure anything.
Alternatively you can do this process manually -
git remote add <origin> <url>
git remote -v
git pull
Pulling code
git pull is used to keep a local repo up to date with it’s remote counterpart. It fetches changes from a remote repo and merges it's history into your local one.
Pushing code
git push is used to push changes upstream. It merges changes from your local copy into the remote copy.
Branching
The most common workflow for collaborating with other developers is the Git Feature Branch workflow. The 'main' branch represents the project's official history; developers create branches off the main branch to write new features. Once work is complete, the feature branch is merged back into the main branch.
To create a branch from the main branch
git branch new-branch-name
To create a branch from a different branch
git branch <new branch name> <source branch name>
Branch from a specific commit id
git branch <new branch name> <commit id>
Checking out
To switch to a branch
git checkout <branch name>
Checkout also provides a shorthand for creating a new branch and switching to it:
git checkout -b <new branch name> <source branch name>
View commit history
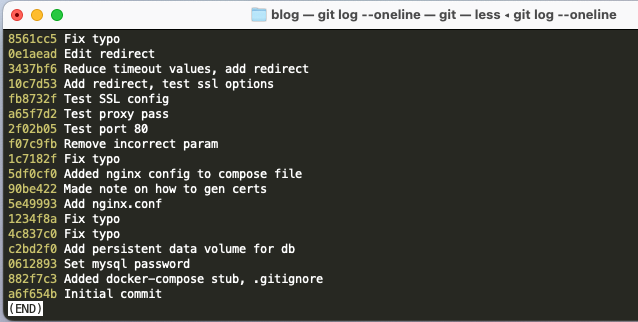
Use git log to page through your commit history. The command has a number of options to help filter your search.
git log --pretty=oneline
git log --graph --decorate --oneline
git log --author=nikki
git log --grep ‘README’
Wrapping up
We've briefly touched on the basic commands to get you up and running with your own git repository. Next time we'll take a look at how to fix mistakes with revert, reset, rebase and cherry-pick; and also how to temporarily shelve uncommited changes with stash.